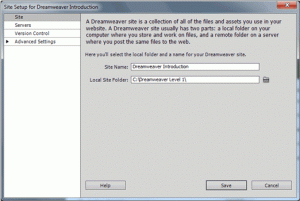
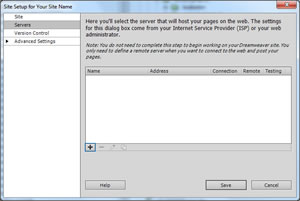
Although Dreamweaver can be used for the creation of individual pages, it assumes that those pages must be part of a wider web site (a fair assumption and one that enables the developer to gain most from the features of Dreamweaver). Therefore the first task when developing a web site with Dreamweaver is to ‘define’ a site. By ‘define’ Dreamweaver means provide it with some basic information on the site such as the name of the site, where the files to be used on the site live and which web server the site is to be published to.
How to Define a Site
- Outside Dreamweaver create a new empty folder which will hold the files that will make up your web site. Name this folder appropriately so that it is easily identifiable.
- From the welcome screen select Dreamweaver Site from the Create New list in the centre of the screen or select Site > New Site.
- The Site Setup dialog box will open in the Site category.
- Replace the default Unnamed Site 1 with the name for your new site.
- You can have multiple sites defined in Dreamweaver to allow you to work on multiple projects. The settings for sites can be exported and imported between different copies of Dreamweaver.
- Under Local Site Folder browse to the location of the files that will make up your web site.
- That’s it. Click Save.
Understanding Local and Remote
The site definition is essentially defining the ‘local’ and ‘remote’ parts of the site. That is the location of the files you have created and location you want to publish them to. Included in Dreamweaver’s site management tools is a FTP package. FTP (File Transfer Protocol) is the method of moving files from your machine to a web server and as a result publishing the web site.
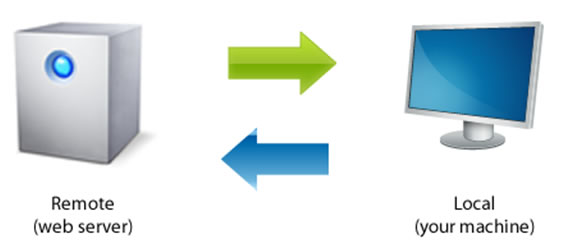
The ‘local’ site is where you files live ‘locally’ ie somewhere on your own PC – a local drive, a networked drive or a disk drive. You defined that in the Site section of the Site Setup.
The ‘remote’ site is where your files will be transferred to by the FTP packages to make the files available on the world wide web. The ‘remote’ site is most often a web server but could equally be a networked drive if you were working on an intranet.
In Dreamweaver CS5 you use the Servers section to select the server you will be publishing to.
You don’t have to do this now and can build pages without filling these details out. However, you will need to revisit this dialog box when you are ready to publish/FTP your files to a web server.
The Files Panel
Once the site is defined Dreamweaver will switch to the workspace view. The local site just defined should now appear in the Files panel on the right hand side of the screen. If not simply choose Window > Files. To view the Site information in the full window click on the Expand/Collapse icon.
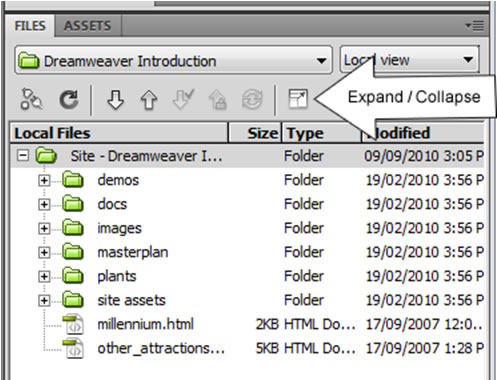
Tip: Most Dreamweaver users like to have this panel easily accessible. Therefore, it is recommended that you leave it open in the workspace. From within this panel you can create new files and folders to structure your web site. Double clicking on a file will open it in the document window for editing.
Modifying a Site
Once a site is created you can edit its settings via the ‘Manage Site’ dialog box. There are numerous routes into this.
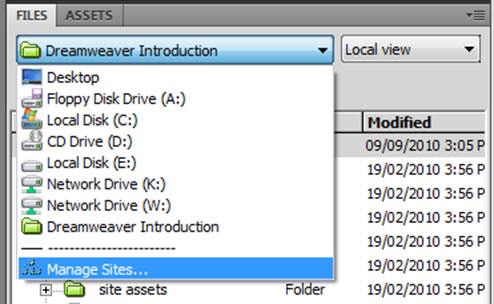
Choose Site > Manage Sites from the menu bar, or click on the drop-down in the Files panel where you site is listed and select ‘Manage Sites’.
Select the site you wish to edit from the Manage Sites dialog box and click Edit.
