CSS Styles
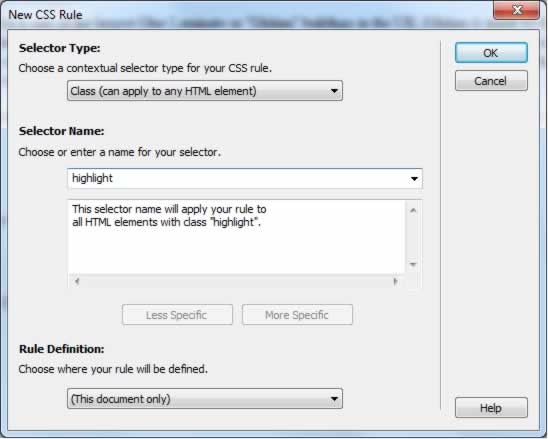
CSS (Cascading Stylessheets) is the way web pages are made to look good. HTML is used to give your document structure whereas CSS is the magic fairy dust that makes the dull old HTML sparkle. Dreamweaver will write CSS for your in numerous different ways as you add formatting to your document. For example, Dreamweaver keeps track of the formatting properties you assign to each text element. These become what is known in CSS as a ‘rule’. When you make choose a font, colour or size the ‘New CSS Rule’ dialog box appears. Use this to assign your style a name, known as a selector name.
Document Only vs External Style Sheets
When created CSS rules they can be stored and used in one document only, or be stored in an external style sheet file.
The default for Dreamweaver CS5 is to create all your styles as document only. This is okay initially, but you may find as you create more and more pages that you want a consistent look and feel and don’t want to have to recreate styles for each new page. That is where external style sheets come in as they allow you to store your style preferences in a CSS file that is attached to the HTML page. The one CSS file can be attached to multiple HTML files – very often to every file in your web site. It is recommended you use an external style sheet as this eases site maintenance and promotes page consistency.
Creating External Style Sheets
To create an external style sheet in the ‘New CSS Rule’ dialog box under ‘Rule Definition’ select ‘(New Style Sheet File)’. Dreamweaver will then create a style sheet file (CSS) file for you.
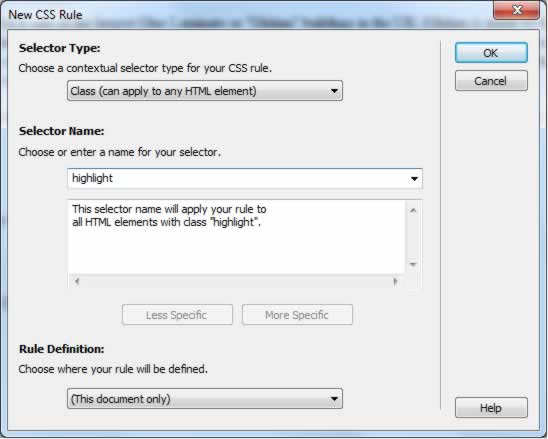
You will then be prompted to name your CSS file. This file can then be referenced by other files in your web site in order to use the same formatting.
Re-Applying Formatting
Once a rule is saved the selector name you use can then be referenced to reapply that style elsewhere in your document. This can be done from the Properties Inspector in HTML mode.

Or in CSS mode
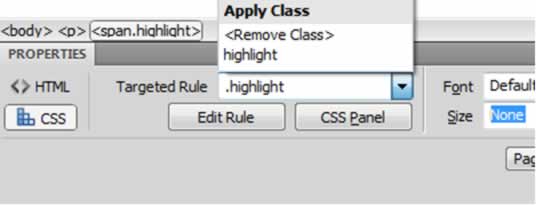
As your document progresses you will find you build up a list of format styles. These are CSS styles that can be reused in other documents.
Page Properties – Both HTML and CSS Mode
The Page Properties dialog box is used to control a number of settings which apply to the whole document. All the catetgories that have CSS in brackets after their name are, surprise surprise, used to create various rules that set document defaults.
Select Modify > Page Properties or right-click and select Page Properties.
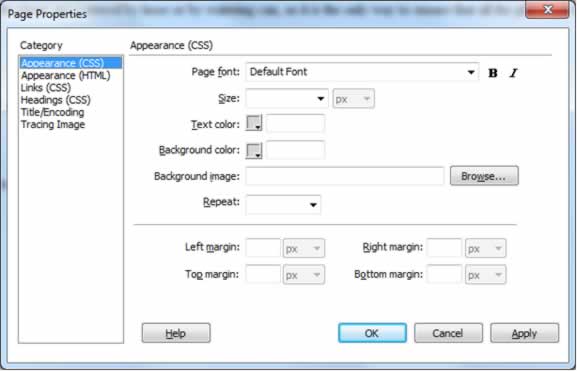 Page Properties are divided into the following sections:
Appearance (CSS) – set the default font, font size, font colour, background colour, background image and the page margins. Use the browse button to select an image to be tiled across the background of the document. Background images can be GIF, JPG or PNG format and should have been specifically created for use as background images – ie be small in file size and tile effectively.
Appearance (HTML) – the ‘old school’ way of formatting pages. It is not recommended you use this tab.
Links (CSS) – Set the link font and size. Define colours for links, active links, visited links and links hovered over by the cursor. Specify whether the links should be underlined (be aware that most users expect links to be underlined – use in context).
Headings (CSS) – As mentioned earlier the H1 to H6 heading styles should be used to improve your search engine ratings. By default these are not a very exciting formatting option but now you can use the Page Properties to set a number of heading styles. When a page element is then set to one of the heading styles via the Properties Inspector, the style declared in Page Properties is used.
Title/Encoding – If you select F12 to preview a page you will see the title of your page displayed in the top bar of the browser. It is important that you add the title because:
- Users can read it.
- It will appear in a browsers tab.
- It is the default name used when users bookmark your page.
- It will help the user identify the page when using the Back button.
- It is one of the many things referenced by search engines to find your page.
You may consider using a naming convention that will give your users a sense of where they are within your site by using the ‘pipe’ character ie “Sheffield Weekly | News | New Restaurant to Open”.
Warning: Do not forget to title each of your pages otherwise you can end up with lots of pages titled ‘untitled’.
If appropriate you can also change the encoding used for characters in the document.
Tracing Image – Some web designers will mock up a page design as a big image in a graphics package like Adobe Photoshop, Adobe Illustrator or Adobe Fireworks. The idea of a tracing image is that the designer can then load the image into Dreamweaver to act as a guide when actually creating the page.
This image is for reference only, and does not appear in the published page.
Page Properties and External Style Sheets
When creating format styles we recommended earlier that you do so in an external style sheet. Unfortunately when you use ‘Appearance (CSS)’ in the Page Properties Dreamweaver CS5 starts to write your CSS rules in the document only and not in the external style sheet. You can see this by opening the CSS panel.
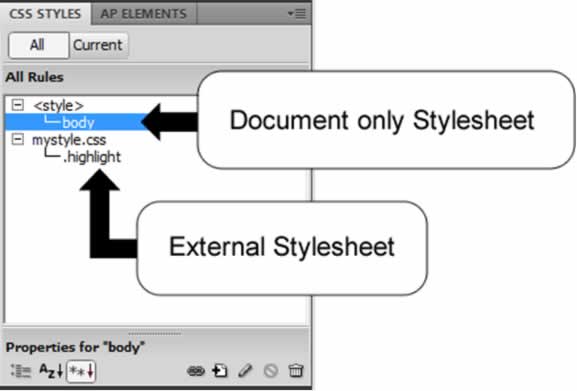
In the illustration below the <style> tag represents the document only stylesheet. The mystyle.css represents the external stylesheet.
Merging Stylesheets
It is not technically incorrect to have styles stored in both a document and an external stylesheet. However, you may find it easier to manage as well as apply styles if they are placed in an external stylesheet. To do so inside the CSS Styles window you can simply drag the styles from the document only stylesheet into the external stylesheet.
The CSS Styles panel should now appear as follows:
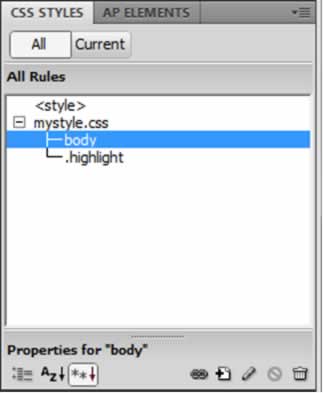
All the styles are now listed inside the external style sheet and the <style> tag (that holds document level styles) is empty.