Publishing
Publishing is controlled by the Site panel which has a host of powerful features to ease management of the entire web site.
Link Checking
When individual pages are renamed or moved around the site structure then Dreamweaver will recalculate the appropriate relative links. Dreamweaver will also check links in the site.
- expand the Site Panel;
- select Site > Check Links Site Wide;
- the Results Panel now opens and will display any broken links on the site;
- fix any broken links that appear by double-clicking on the file listed in the Results Panel to edit it.
You can also use the Results panel to run reports listing:
- Orphaned Files – that is files that are not linked to any others;
- External Links – Dreamweaver will list your external links but does not provide a facility to check them.
To run these reports pick the report type from the drop-down list and click on the green arrow ‘run’ button.
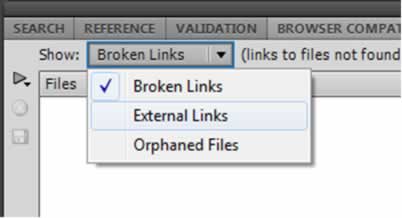
You can checks for Broken Links and External Links for the current document, selected files or the entire site.
Warning: You can only run an Orphaned Files report for the entire site.
Publishing Options
Once you site is ready for publishing you can use Dreamweaver to move the file from your local machine to a remote web server. Earlier in the course we defined the ‘local’ side for Dreamweaver and in order to publish we now need to return to the site definition to tell Dreamweaver where we would like to publish your web site.
Choose Site > Manage Sites to open the Manage Sites dialog box. Select your site in the dialog box and Click Edit. In the Site Definition dialog box click the Advanced Tab.
The information defined in the earlier lesson appears in the Site category. Remember this is where the files live whilst the web site is underdevelopment.
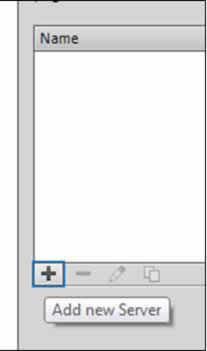
Click on the Servers category. This is where we will tell Dreamweaver how to publish your site. Add a server name to identify the connection. You can define multiple servers in Dreamweaver if required.
There are a number of transfer types you can use:
- FTP – File Transfer Protocol – the most common way of publishing to a webserver. Requires a ‘host’ and then a login/password.
- SFTP – Secure File Transfer Protocol
- Local/Network – Will prompt you to identify a drive/folder where you wish to move your files. This options is often used on intranets where you as the developer have direct network access to the webserver.
- WebDAV – Web-based Distributed Authoring and Versioning – a securer way of transferring files. Needs host support.
- RDS – Requires a Coldfusion host.
The two most common methods of publishing are FTP and Local/Network.
Setting Up FTP Publishing
Enter the following details to FTP / publish to your web server.
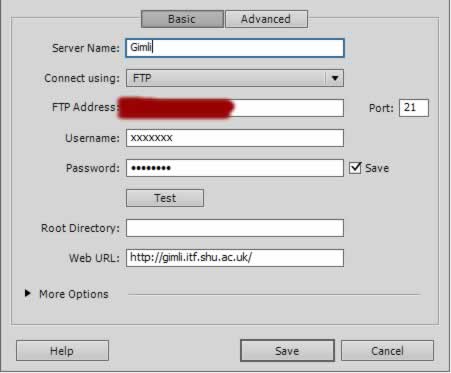
FTP Address – The IP address or name of the webserver which will host the web site.
Username and Password – The FTP account details for the users account on the web server.
These settings will be given to you by your host ISP (Internet Service Provider) or web server administrator. Once they are entered click the Test button to ensure the details are correct.
Use the Test button to check you have the details entered correctly.
Optionally some ISPs will require you to add a root directory name. This information will be provided for you my your ISP. For example on many web servers you are required to enter htdocs as the root directory.
The Web URL value is also optional. This would be your address when published ie http://www.mysite.com.
Setting Up Local/Network Publishing
If you choose Local/Network you are then prompted to enter the path to your server folder. Then Dreamweaver will move the files to that directory when you publish them.
Whichever connection technique you use these setting will be saved for you the next time you use Dreamweaver so that they do not need to be re-entered every time you publish.
Once you have added your publish setting Save to return to Site Setup Window.
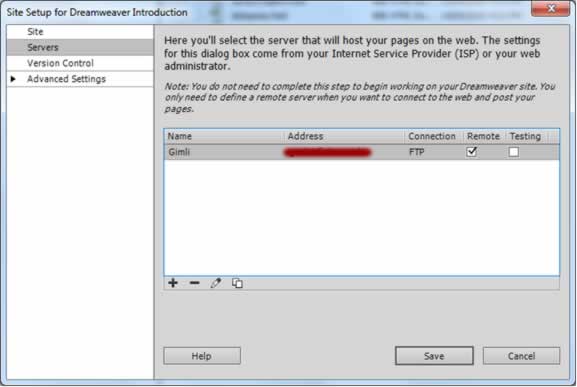
Tip: To change settings on a server double click on the entry in the Servers Category.
Save to exit the Site Setup. This will find you back in the Manage Sites dialog box with your site listed. Click Done to exit. Dreamweaver will take a second to create a cache, that is it will do an ‘audit’ of the files to enable it to manage relative links between documents.
Publishing Your Web Site
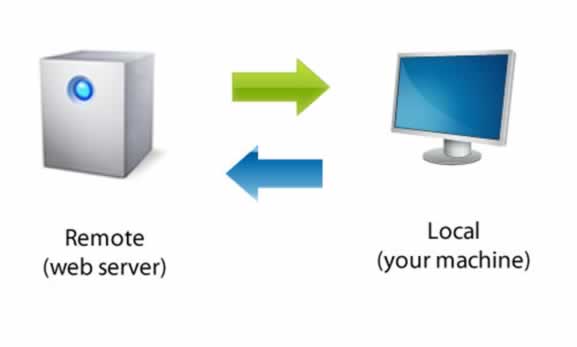
Publishing is simple a case of moving the files from your ‘local’ machine to the ‘remote’ site. Dreamweaver allows you to move individual files, individual folder, combinations of files and folders or the entire web site.
Use the ‘put’ arrow (turns blue on rollover) to move selected files or folders upto the web server. In reverse the down ‘Get’ arrow will bring files down from the web server to the local machine (turns green on rollover).
Tip: Notice that these arrows are available within the reduced Site Panel and in the main document window to allow files to be uploaded without switching view.
When a file is uploaded Dreamweaver will prompt users with the Dependent Files dialog box. This asks whether dependent files should be included in the FTP transaction. Dependent files can include CSS files, images, flash movies and scripts. These are files that are needed to correctly display the file on the web server. HTML files that are linked to from another HTML document are not classed as dependents.
To publish the entire site, highlight the root folder and click on the Put Files up arrow.
Synchronize
You may find it useful to use the Synchronize feature. For select files or for the entire site this can be used to:
- Put newer files to remote – checks the local site for files that need publishing.
- Get newer files from remote – checks the remote site for files that are newer than those held locally.
- Get and Put newer files – synchronizes local and remote such that both have the latest copies of the files.
When the ‘Put newer files to remote option’ is selected there is a check box option to ‘Delete remote files not on local drive’ which would clean up files on the webserver.
When the ‘Get newer files from remote option’ is selected there is a check box option to ‘Delete local files not on remote server’ which would clean up the local machine.
Whichever options are selected Dreamweaver will offer a preview panel such that you can manually check the synchronization before it is carried out.
The preview panel allows you to change the action to be performed on individual files.
Saving Site Settings
Although your site settings are saved by Dreamweaver, if you machine crashes you may loose your site settings. You may also move from one machine to another. Rather than having to re-enter your site settings you will find it useful to export them and save them safely.
To export site settings
- Choose Site > Manage Sites to open the Manage Sites dialog box. Select your site in the dialog box and Click Export.
- Choose ‘Back up my settings’.
- Save your file to somewhere sensible not in the web site itself.
Your Site Settings (that is host name, login/password) are saved to a STE file.
To import site settings
- Choose Site > Manage Sites to open the Manage Sites dialog box. Click Import.
- Browse to your STE file and click OK.
Your site is now set up.
Note: This option only saves the site settings NOT the files and folders that make up the site.
Warning: DO NOT publish the STE file to your web server as you are in effect giving your login/password away. Save the file outside the site somewhere safe like a USB memory stick.